
Invisible Studio · The finishing detail
A quieter visual language for your ceiling. Discover the paintable air vent that brings the finishing details together.
 Explore the product ↗
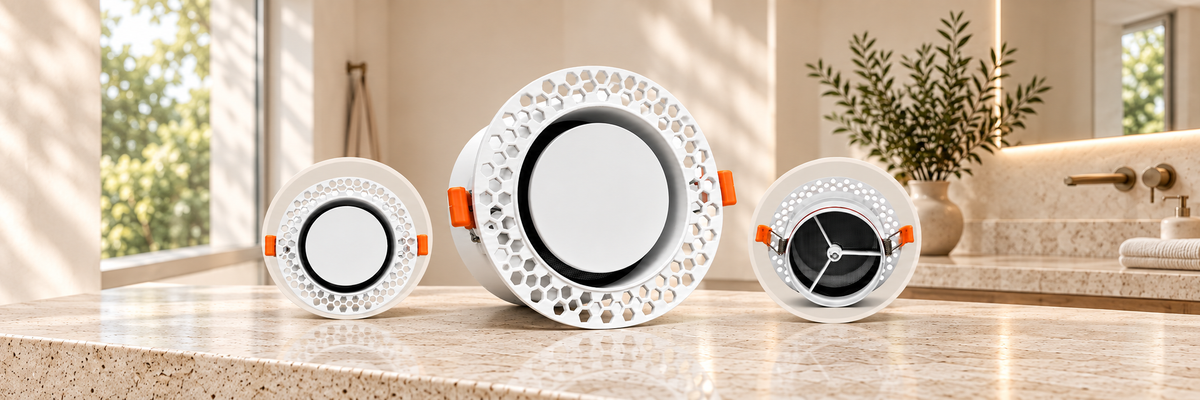
Meet the air vent
A plaster-in ceiling vent with a paintable cover plate. Designed to become part of the finish, so the room remains the focus.
€20,00 per vent
View product & details Check dimensions & compatibilityShipping calculated at checkout. Delivery & returns
Designed to disappear
The honeycomb flange is plastered into the ceiling so the vent sits flush with the surrounding surface.
A circular gap allows air to pass around the cover plate. Ask your installer to confirm the required ventilation performance.
The white cover plate can be painted with the ceiling so the vent reads as part of the finish.
Inspiration for your space
Explore the finished look, from warm kitchens to calm bathroom interiors. Select an image to discover the vent.

01 / Bathroom inspiration

02 / Kitchen inspiration
Interior inspiration. Ask your installer to confirm suitability for your ceiling and ventilation system.

Look a little closer
A simple appearance, with the practical details behind it. Explore the connection, flange and cover before choosing your vent.
The surrounding flange is incorporated into the ceiling finish.
Finish the white cover plate to suit the surrounding ceiling.
Check your duct size and confirm the separate ceiling cut-out before installation.

The finished result
The cover sits within the ceiling finish, with a circular gap around its edge. A considered alternative to a prominent surface grille.

From planning to finishing
Review the installation overview, then confirm your ceiling construction, cut-out dimensions and available depth with your installer.
The duct connection is Ø100 mm. It is not a ceiling cutting template.
Follow the supplier’s fixing, plastering and coating instructions.
Installation
Confirm the cut-out diameter, installation depth and ceiling suitability with your installer before cutting. The Ø100 mm duct size is not a cut-out measurement.
Fit the vent body to the duct before seating it in the ceiling.
Fit and secure the vent using the supplier’s instructions for your ceiling construction.
Skim over the flange, then paint the cover plate with the ceiling.
| Duct connection | Ø100 mm |
|---|---|
| Material | White ABS |
| Finish | Paintable white cover plate; plaster-in flange |
| Ceiling cut-out | Confirm with the supplier before cutting; this differs from the duct size. |
| Installation depth | Confirm the required clearance before ordering. |
| Suitable ceilings | Ask your installer to confirm suitability for your ceiling construction. |
| Box contents | One air vent. Confirm included fittings and any additional installation materials before ordering. |
| Ventilation performance | Ask for supplier airflow and pressure data for your ventilation system. |
Questions
Fit, finish and installation.
This model has a Ø100 mm duct connection. Check your system and the separate ceiling cut-out dimensions before ordering.
The white cover plate is paintable to match the ceiling. Follow the supplier’s preparation and coating instructions.
Ask your installer to check the cut-out size, available depth, ceiling construction and required airflow. Do not use the duct diameter as the cutting template.
Follow the supplier’s maintenance instructions. Ask us for product guidance before removing or adjusting the cover; the quoted 0–45 mm range has not been confirmed as a performance specification.
Shipping is calculated at checkout. Use the Delivery and returns links below for available policy details, or contact us before ordering.
Here to help
Choosing a vent, planning an installation or checking an order? Talk to Invisible Studio.